
Logentry 003.04
second Attempt
Galisteo, , 2038-05-16
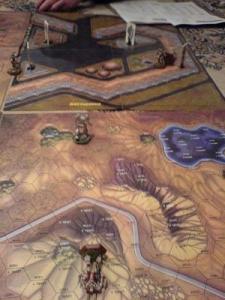
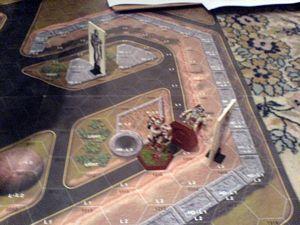
| On our second attempt we left behind HOD-4 and HOD-5 to guard the dropship (in case the enemy flyers came back) and attacked with HOD Leader, HOD-2, HOD-3 and the latest addition to our unit HOD-6. When we neared the storage area again, this time from the opposite direction, the Valyrie, Firestarter, Javelin and Victor were sighted. We immediately all attacked the Victor. Only HOD-6 remained at the back on a hill to give covering fire with his long range missiles. Unfortunately he could not see the enemy mechs which all were behind a high concrete wall, but the enemy Hunchback was hidden in a wood we had passed. When he emerged at our back, he was immediately taken under constant LRM bombardment which kept him from raking our rear armors with his AC/20. We inflicted a heavy toll on the Victor, but his autocannon/20 proved to be to much again. Soon we were all riddled with autocannon rounds. When my mech had lost his whole left side (arm, torso and leg) I ejected. I was pretty sure that I had identified the building where the 'Mech-less enemy commander had his HQ, so I adorned my ablative flak armor vest, shouldered my Zeus heavy rifle, strapped on my sword and headed out for Kapitan Daridov. HOD-3 retreated towards our dropship and ordered the two 'Mechs on guard to come to our help, being closely followed by the Firestarter. The Whitworth covered this retread, letting loose with constant volleys of LRM fire. Finally, HOD-2 managed to get behind the victor and let loose with his LB-10X autocannon. On of the shots hit the right torso, where no armor was left, and incinerated the ammunition of the autocannon/20. The Victor exploded and succumbed to a heap of smoldering metal. But at the same time HOD-2 opened fire, the victor did the same - and destroyed the arm with the LB autocannon. When I entered the HQ building an enemy soldier just rounded the corner. After we exchanged some shots I gravely wounded him and he gave up. I bound and gagged the guard, after he told where I could find Kapitan Daridov and how I could get there. There was a guarded elevator and an emergency staircase. HOD-2 started to retreat as well as the Hunchback came into range. HOD-6 bombarded the Firestarter with missiles and lasers. Finally the armor in the center torso was penetrated and the gyro damaged. The next salvo pulverized the 'Mech. The Valkyrie engaged in an LRM duel with HOD-6, but when HOD-6's center torso was heavily damaged he withdrew as well. This gave the Javelin pilot new courage and he started to pursue HOD-2. In the HQ-building I threw a grenade in the corridor in front of the elevator. The blast killed the two guards there and disabled the door. Then I descended the staircase. Half the way down to the 3rd sublevel, where Daridov was according to the guard, someone came up towards me yelling in russian and opened fire with his automatic rifle. We exchanged some shots which wounded us both critically and we both passed out. When I woke up again the enemy soldier woke up as well. I was able to read his name tag and he turned out to be Kapitan Daridov! He tried to get up and I opened fire on him again. Hardly being able to hold my weapon I missed him twice before I finally hit him and he passed out again. I then tried to stop the bleeding of my wounds which i managed to do, then I tried to stabilize Daridov in which I failed miserably. I then hauled myself down to the third level into the command room. The lonely tech there did not put up any resistance (I must have been a very cruelsome sight, armed to the teeth and covered all over in blood) and was bound to his chair. I then used the radio on the frequency of the Marik soldiers: "This is 1st Lt von Stein from the Harbingers of Defeat: Marik soldiers, your commando post is under our control, Kapitan Daridov has been critically wounded, I ask you to surrender immediately!" This radio call coincided with the arrivel of HOD-4 and HOD-5, and this combination made the three remaining Marik pilots surrender. Log Entry by Hptm Theobald von Stein, hod1 | 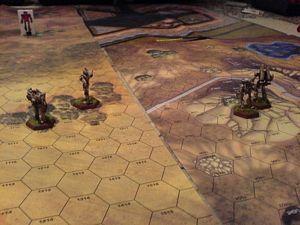
|
|
This is an unofficial website dealing with our games of Classic Battletech and MechWarrior. For official information on the game and the game's background please visit www.classicbattletech.com.
This website should work well with all major browsers. If you encounter any problems please contact me. To visually get the most out of this website please download the font 'Truetype Font Battletech Oldstyle' [23.4 K] available for free from www.classicbattletech.com. ~ |
|
|
- D i s c l a i m e r -
No BattleMechs were harmed in the making of this website. Although we try to, the historical events depicted here need not follow the official timeline. The campaign and it's characters are purely fictional. Any similarities to persons living, dead or not yet born are purely coincidental and not intended. MechWarrior, BattleMech, ‘Mech and AeroTech are registered trademarks of WizKids, Inc. All Rights Reserved. |
|
Visitors
since2007/02/02 54088